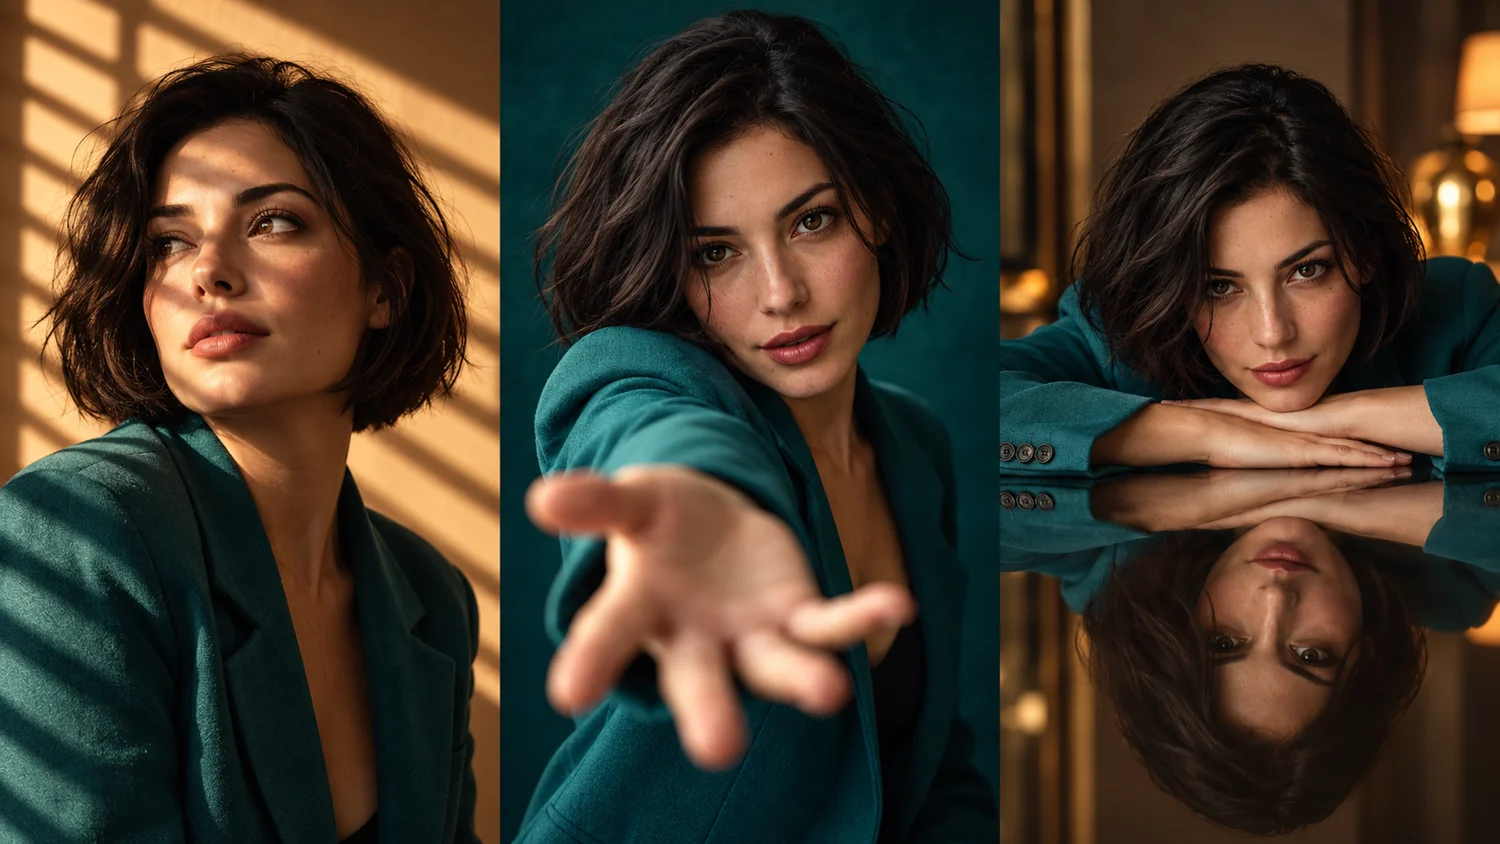
A portrait can feel completely different when you change the light, perspective or setting. You can explore those ideas with AI image editing, starting with a photograph and a clear description of the effect you want.
A short video shared five ideas under the labels /scrollstopper, /reachcamera, /reflectionshot, /shadowplay and /framewithinframe. The visual concepts are useful inspiration. Treat these labels as creative shorthand: the video does not establish them as official ChatGPT commands, and typing a slash label alone does not guarantee its demonstrated result.
Below are my expanded prompts inspired by those five effects. They describe the composition directly, so you can personalise the instructions instead of relying on a mysterious code.
How to get started
Upload a clear portrait in a ChatGPT conversation that supports image creation and editing, then describe your change. OpenAI’s image-editing guidance explains that you can upload an existing image and request edits in words.
Choose a well-lit photograph with a visible face. Say which features, hairstyle and clothing should stay recognisable, and replace the details in square brackets below. Use photographs you have permission to edit. These prompts are starting points, and results will vary.
1. Scroll-stopper: create a stronger focal point
The first idea uses a bold portrait, dramatic lighting and a simple composition. For a social post, give the viewer one obvious place to look rather than filling every corner with detail.
Using my uploaded portrait as the reference, create a cinematic editorial image. Keep my distinctive facial features, hairstyle and recognisable appearance. Place me in [setting], looking directly towards the camera with a confident, natural expression. Use contrasting warm and cool lighting, a softly blurred background and a clear focal point on my face. Leave some uncluttered space for a headline I will add later. Use a vertical 4:5 composition. Do not add text or logos.
Try adjusting: the background and lighting before adding props. “Scroll-stopper” describes a creative aim; it is not a promise of more clicks or engagement.
2. Reach camera: add depth with perspective
A hand reaching towards the lens can make an image feel more immediate. The illusion comes from perspective: the hand appears larger because it is closer to the viewer.
Reimagine the person in my uploaded photo reaching one hand towards the camera. Preserve their recognisable face and hairstyle. Use a wide-angle perspective with the hand in the foreground and the face clearly visible behind it. Keep the fingers anatomically plausible and separate, with a natural wrist position. Add [background] and cinematic side lighting. Make this a single still photograph, with no text.
Check carefully: fingers, wrists and the connection between the arm and shoulder. If the pose looks awkward, ask for a gentler reach with the hand further from the lens.
3. Reflection shot: build a mirrored composition
A glossy table or still surface introduces a second visual layer. The reflection needs to correspond with the subject and the light to feel convincing.
Create a cinematic portrait of the person in my reference photo seated behind a polished dark table. Preserve their recognisable facial features and hairstyle. Include a realistic reflection of the face and upper body in the tabletop, aligned with the subject and consistent with the camera angle. Use [colour] accent lighting, a simple background and a calm, confident pose. Keep the reflective surface clear of unnecessary objects.
Try adjusting: the strength of the reflection. Ask for a slightly softer reflection if the first result looks like a second person beneath the table.
4. Shadow play: use light as part of the design
Diagonal window-blind shadows can give a straightforward portrait a more atmospheric feel. Describe where the light comes from and how much of the face should remain visible.
Use my uploaded portrait to create a natural editorial photograph with warm late-afternoon sunlight through window blinds. Keep my face and hairstyle recognisable. Cast soft diagonal bands of light and shadow across the wall, clothing and part of the face, while keeping the eyes readable. Use realistic skin texture, restrained colours and a simple indoor setting. Avoid heavy beauty retouching.
Try adjusting: shadow softness and contrast. For a friendly business image, softer shadows may suit the tone better than a very dark, dramatic treatment.
5. Frame within a frame: make a playful visual loop
This effect places a picture inside the scene itself. A person holding a framed portrait creates a visual puzzle, especially when that inner portrait repeats the same composition.
Create a realistic portrait of the person in my uploaded photograph holding a rectangular picture frame in front of their torso. Preserve their recognisable appearance. Inside the frame, show the same person holding a smaller matching frame, with just one further repetition. Keep all frames straight and believable, with natural hands gripping the outer frame. Set the scene in [location] with warm cinematic lighting. Do not add lettering.
Keep it manageable: limit the repetitions. Too many nested frames make small faces and hands harder to inspect and the composition more cluttered.
Refine the image one change at a time
Once you have a promising result, give a focused follow-up such as “keep the pose and background, but soften the shadows” or “keep the composition and make the reflection less intense”. This makes it easier to judge which adjustment improved the image.
Inspect the face, hands, reflections and frame edges before sharing. Requesting a recognisable likeness does not guarantee an exact match. If you need a precise headline, add the final text in your design editor after choosing the image.
These ideas create still images. A glowing hand, a dramatic camera angle or a repeated frame does not by itself animate the result.
Choose the effect that fits your post
Start with shadow play for a subtle portrait, a reflection for a polished editorial look, or the reaching-hand effect for a bolder perspective. Pick one technique, give it a specific setting and compare a few variations before choosing your favourite.
For more inspiration, explore six creative ChatGPT photo prompts and the free 100-idea guide. If you want clearer instructions for everyday tasks too, read four prompts for better ChatGPT answers.